FREE SHIPPING FOR ORDERS OVER $199
60 DAYS RETURN POLICY
5% OFF FOR NEWSLETTER-SIGN UP

A simple DIY outdoor kitchen with pallets – tips from an interior designer

Take advantage of the hot days of summer and build a simple DIY outdoor kitchen in your garden that allows you to take your cooking into the open.
HOW TO BUILD YOUR SIMPLE DIY OUTDOOR KITCHEN
An outdoor kitchen is a little piece of luxury in everyday life that allows you to take your meal preparation and cooking out into the open on those balmy summer days. Meal prepping can be more fun and an outdoor kitchen makes it possible for everyone else to join in the fun as well. Interior designer Sara Zetterström built and decorated this simple DIY outdoor kitchen from scratch with the help of EU pallets. She also shares her best tips with us for decorating your outdoor kitchen with stylish and practical interior details.
To build a simple DIY outdoor kitchen, you will need:
- 6 Euro pallets 80x120 cm (consisting of five boards, three wider and two narrower)
- Optional: An extra pallet (Doesn't need to be an Euro pallet) approx. 110x110 cm
- Optional: an old kitchen faucet to which a water hose can be connected <br>
Tools:
- Hammer
- Crowbar
- Nail puller (not necessary but will make the process easier)
- Saw (A tiger saw with wooden and metal blades is best)
- Marker pen
- Screwdriver
- Approx. 50x long wood screws, 80 mm
- Mounting strap & two screws to fasten the tap
Tip: Euro pallets can sometimes be difficult to obtain as most are part of a return system. Sara bought hers from a carpentry company.

Purchase Euro pallets from your nearest carpentry company and build yourself a simple outdoor kitchen this summer.

Tip: Use the lower boards that are left over as shelves for your outdoor kitchen!
HOW TO BUILD YOUR SIMPLE DIY OUTDOOR KITCHEN:
The kitchen consists of two identical modules, each module is made from two ends, a worktop, a back wall and optional shelves.
Step 1: Saw one pallet in the middle of the long side with a tiger saw to create the ends (turn the the pallet so the cut side faces backwards and the top of the pallet outwards).
Step 2: One pallet is needed for the back wall and another for the worktop. Use the crowbar to remove the underside boards and blocks. Try not to damage the boards, this can be used as shelves. Save the nails, these can also be reused to attach the worktop to the ends. Move the horizontal boards at the top and reattach so they are close together, you will not need to move the boards on the outside edges.
Tip: Reuse the rusty nails to maintain the rustic look and because it is more durable, says Sara.
Step 3: Nail the worktop together with the two ends. Add a few extra nails if needed to make it more stable (the nails that are not attached to anything can be bent down on the underside so they are not dangerous). Use the vertical outer boards of the rear wall to fasten it to the base with long wooden screws (approx. 6 screws in each board). Then saw off the excess from the other vertical boards.
Step 4 [Optional]: divide the remaining pallet in the middle to be used as a shelf brackets. The leftover boards can be used to make practical shelves for your utensils in your DIY outdoor kitchen.
Tip: Drill a hole in one module for the regulator and the hose for the LPG hob, so that the LPG gas can, can stand behind or on the shelf below. Use mounting straps to screw the kitchen faucet to the outside of the end of the second module.
Are your Euro pallets different shades of wood? Sara has a recipe for a simple iron acetate to stain the boards and achieve a more rustic and uniform look:
Stain: iron acetate
- 250ml 24% vinegar
- 2 pieces of steel wool
How to:
- Put the steel wool in a jar and pour over the vinegar, put on a lid and let stand for at least a day, preferably longer.
- Brush the stain on the lighter surfaces and allow it to sit. Wipe off any excess with a cloth after 30 - 60 min.
Now your simple DIY outdoor kitchen is ready to be decorated!

This simple DIY outdoor kitchen has both a food prep / cooking area and a dish washing area as well as good storage underneath where pots, pans and other utensils can be easily accessed.
INTERIOR DESIGNER TIPS FOR FURNISHING YOUR SIMPLE DIY OUTDOOR KITCHEN
Now that you've got a step-by-step guide to building a simple outdoor kitchen from pallets, it's time to decorate it. Here are Sara's 5 best tips on how you can decorate your outdoor kitchen with practical and stylish interior details to make cooking and the time you spend in preparing your meals a little easier:
1. Set up a magnetic strip in your outdoor kitchen for your knives:
Screw a magnetic strip to the side of the stove and keep your knives easily at hand when you are cooking.
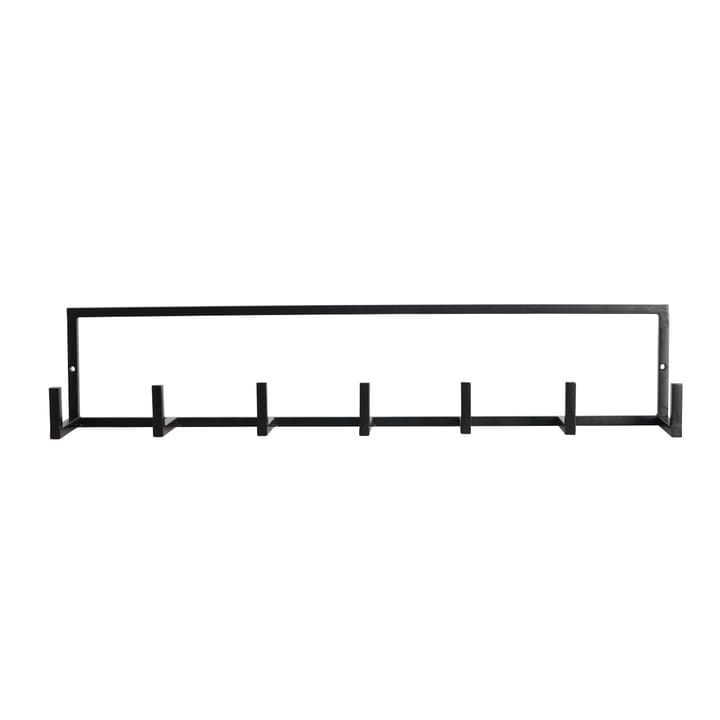
2. Set up hooks for your most useful tools:
Hang utensils that you often use on fixed hooks in your outdoor kitchen so they are available at arm’s reach.
3. Prepare a pot or jar to store your utensils in:
A rustic plant pot or mug is perfect for ladles, tongs and spatulas and can be easily carried in and out of your home.
4. A practical dish rack and a sink:
When you need more counter space, it is good to have a small and flexible dish rack that can be hung up or placed against the wall when not in use. A portable sink is also practical as you can easily pour the sink water into the flowerbed when you have finished washing. Be sure to always use ecological detergent!
5. Increase the cosy factor with a string of lights in your simple DIY outdoor kitchen:
Decorate your DIY outdoor kitchen with a string of lights that raises the cosy factor as the evening draws in, concludes Sara.

Free up the work surface with a practical magnetic strip for your knives.

Use the back wall of your outdoor kitchen to hang utensils that you often use and need to have to hand easily - Sara used a handy coat rack!
- In an outdoor kitchen, you want things both close at hand and to free up limited workspace, so it is good to use the back wall for hooks and storage - Sara Zetterström

Decorate your outdoor kitchen with a string of lights that raises the cosy factor when darkness begins to fall.

Make a cooling welcome drink from your DIY outdoor kitchen to wow your guests.

A large basket is perfect for storing your fresh veg but also make it much easier to clean up, helping you carry those items inside that should not be left out overnight, Sara says.
Do you have the urge to build an outdoor kitchen this summer? We hope we have given you some tips and inspiration with Sara Zetterström's guide and interior design tips. A simple DIY outdoor kitchen is the perfect way to extend the summer days outdoors and gives you the freedom to be able to cook outdoors with your loved ones for memorable moments together.
Photography: Angeliqa Daldorph Stylist and designer: Sara Zetterström


